Your First Scene
This guide will walk through the process of initializing IdleKit from a basic scene. By the end of the process, you will be familiar with the initialization flow, and know how to extend and override IdleKit's existing behavior so you can add your own custom functionality.
Note
A complete implementation of this tutorial can be found within the idlekit-examples package, under the Tutorials/FirstScene folder.
Prerequisites
Ensure that you have the idlekit-ioc, idlekit-logging, idlekit-framework, idlekit-implementation and idlekit-examples packages in your project so that you have access to the required interfaces. See the Getting Started page for directions.
Before You Begin
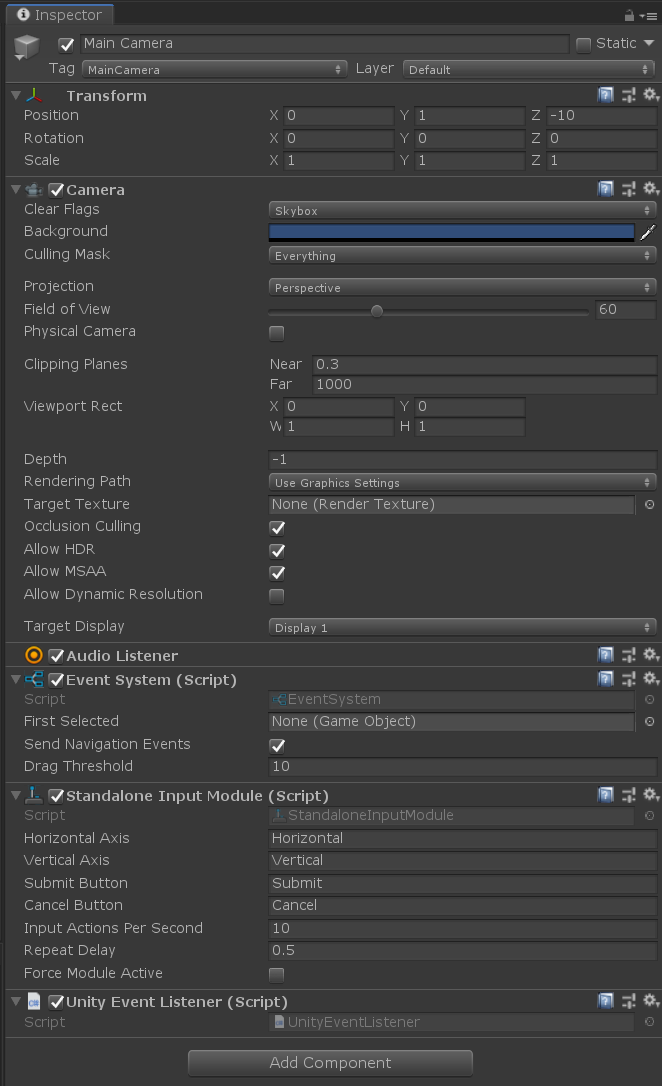
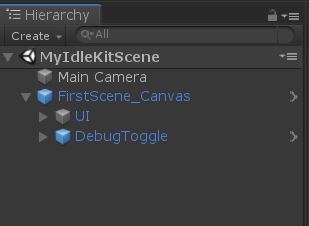
First, create a new Scene within your Unity Project named MyIdleKitScene. Remove the Directional Light from the scene. Then, from the hierarchy view, select the MainCamera and, in the Inspector, add a Unity Event System and Standalone Input Module component. Next add an IdleKit Unity Event Listener component.
Your inspector should now look like this:
Creating an Installer
Next you need to add an Installer to your scene. The Installer defines what dependencies are bound to IdleKit's DependencyContainer and how they are bound (see Binding for more information). You are able to create different implementations of IInstaller to bind different dependencies based on the requirements of your project or individual scene.
Create a script within the Assets directory and call it MyInstaller.cs. The class needs to extend StandardMonoInstaller in the idlekit-implementation package as follows.
Make sure to rename your implementation to MyInstaller.
using System.Collections.Generic;
using IdleKit.Implementation;
using IdleKit.IoC;
using IdleKit.Logging;
using UnityEngine;
using UnityEngine.SceneManagement;

/// <summary>
/// A simple <see cref="IInstaller"/> extension which in a project would be
/// used to bind any project level dependencies. IdleKit dependencies are
/// bound within the base classes.
/// </summary>
public class FirstInstaller : StandardMonoInstaller
{
    public override void Install(IContainer container)
    {
        base.Install(container);

        InjectUI(container);

        // Project specific dependencies would be bound at this point.
        Debug.Log("Installation of dependencies is complete");
    }

    public override void Uninstall(IContainer container)
    {
        base.Uninstall(container);

        // Project specific dependencies would be unbound at this point
        Debug.Log("Uninstallation of dependencies is complete");
    }

    /// <summary>
    /// This method is only included in this example so that we are able to use the
    /// simple IdleKit views as a UI within the scene.
    /// </summary>
    protected virtual void InjectUI(IContainer container)
    {
        // Get all IInjectables in the scene (all IdleKit views are IInjectables) and inject
        // them to setup dependencies.
        List<IInjectable> interfaces = new List<IInjectable>();
        GameObject[] rootGameObjects = SceneManager.GetActiveScene().GetRootGameObjects();
        foreach(var rootGameObject in rootGameObjects)
        {
            IInjectable[] childrenInterfaces = rootGameObject.GetComponentsInChildren<IInjectable>(true);
            foreach(var childInterface in childrenInterfaces)
            {
                interfaces.Add(childInterface);
            }
        }

        int len = interfaces.Count;
        for (int i = 0; i < len; i++)
        {
            interfaces[i].Inject(container);
        }
    }
}
The Install method is responsible for binding each IBinding (ie. dependency) to the Container. The base StandardMonoInstaller implementation binds all of the default Entities, Services and Actions used in IdleKit. The MyInstaller class then extends the base implementation to inject the UI views that will be used later in this tutorial. When writing an Installer for your project, you would do similar to setup your project specific dependencies. The Uninstall() method is responsible for unbinding each IBinding from the Container.
Warning
It is important to unbind each IBinding in the Uninstall() method to ensure you do not waste memory or have the incorrect instance of IBindings within the Container.
For more information on the process of binding and resolving, see Dependency Container Components.
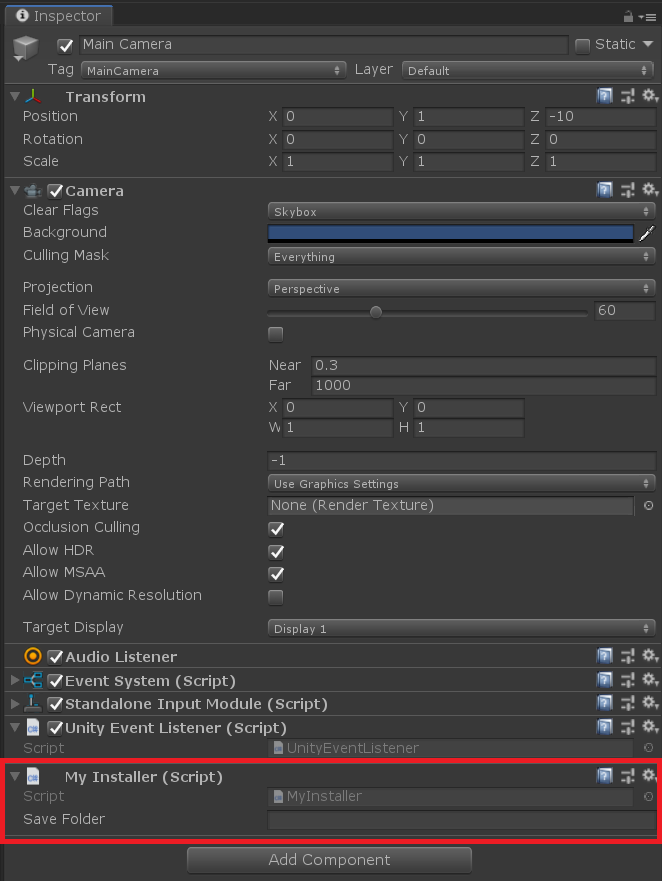
Now add the MyInstaller script to the MainCamera GameObject in the Unity hierarchy. Your MyStartup GameObject should now look something like this:
Adding a Context
Next you need to add a Context into your scene. The Context is the top level object in IdleKit's dependency injection implementation. It brings together a Container with a specific Installer implementation. IdleKit provides a number of different Context implementations out-of-the-box. In this case, you will use the MonoContext as it's a MonoBehaviour that can be added directly into your scene.
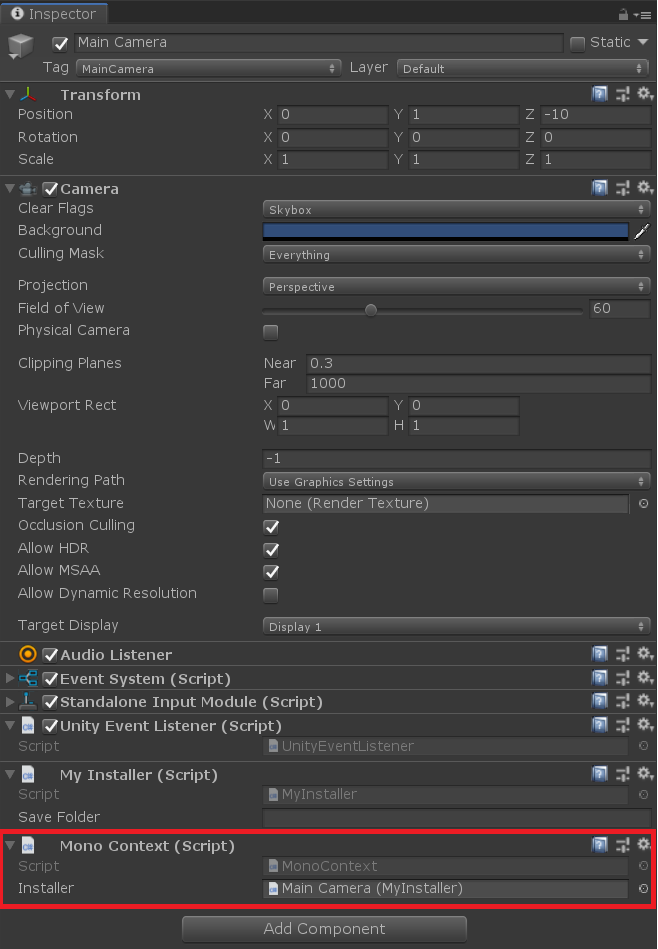
In order to have a reference to MonoContext in your project, add it as a component to your MainCamera. Then, drag the previously created MyInstaller component into the Installer Serialized Field in the MyContext component.
Your MainCamera should now look something like this:
Creating a Startup
Startup is the entry point for IdleKit projects. It is responsible for starting the game, determining which Content should be loaded, loading data associated with that Content and instantiating the Entities within the Content.
Note
For thoroughness, this section of the guide details the creation of a new IStartup implementation. For your project you will likely want to derive from the Startup or SimpleStartup implementations depending on your requirements. Both of these implementations provide an asynchronous startup process via IdleKit's LoadPhase system.
Start by creating a new MyStartup script within your project, add the following dependencies and base classes for your implementation.
Make sure to rename the class to MyStartup.
using System.Collections.Generic;
using IdleKit.Framework;
using IdleKit.Implementation;
using IdleKit.IoC;
using IdleKit.Logging;
using IdleKit.Tools;
using UnityEngine;

public class FirstStartup : MonoBehaviour, IStartup
{

}
Next add the fields that will be required by the class.
[SerializeField]
protected CanvasUI _canvasUI;

protected IContext _context;
protected IContext context => _context ?? (_context = GetComponent<MonoContext>());

protected IUserSavedData _userSavedData;
protected IDataLoaderService _dataLoaderService;
protected IEntityLoaderService _entityLoaderService;
protected IEntityResolver _entityResolver;
protected IActionService _actionService;
Data references
Now we get to something a little more interesting. Add the following code to specify the data related references within your MyStartup class.
[SerializeField]
protected SimpleEntitiesDatabase[] _entitiesDatabases;

[SerializeField]
protected SimpleEntitiesDatabase _globalEntitiesDatabase;

[SerializeField, GuidReference(typeof(IContentData))]
protected string _mainGameContentId;
public string mainGameContentId => _mainGameContentId;

public List<string> contentIds
{
    get
    {
        List<string> results = new List<string>();
        int count = _entitiesDatabases.Length;
        for (int i = 0; i < count; i++)
        {
            results.Add(_entitiesDatabases[i].contentDataAsset.data.id);
        }

        return results;
    }
}

protected virtual IStaticData[] GetGlobalData()
{
    if (_globalEntitiesDatabase != null)
    {
        return _globalEntitiesDatabase.staticData;
    }

    return new IStaticData[0];
}

protected virtual IStaticData[] GetContentData(string contentId)
{
    int len = _entitiesDatabases.Length;
    for (int i = 0; i < len; i++)
    {
        SimpleEntitiesDatabase entitiesDatabase = _entitiesDatabases[i];
        if (entitiesDatabase.contentDataAsset.id == contentId)
        {
            return entitiesDatabase.staticData;
        }
    }

    IdleKitLog.LogError($"No static data found for content id: {contentId}");
    return new IStaticData[0];
}
The first few fields specify the SimpleEntitiesDatabase that are used to provide Content specific and Global data for IdleKit. This class acts as a container for all the ScriptableObjects that are going to be used within an IdleKit Content (such as the main game, or an Event). The Global SimpleEntitiesDatabase contains any Entities that are not owned by a Content.
After the definition of the SimpleEntitiesDatabase, there are a few utility methods which are used to access the StaticData within them. This avoids the need to reference the SimpleEntitiesDatabase directly within the core IdleKit code or your game code.
Note
The SimpleEntitiesDatabase is not designed to be a production ready asset management solution, but it is a good starting point to get up and running with your project.
StartGame
Now add the following methods into your MyStartup implementation:
protected virtual void Start()
{
    StartGame();
}

/// <summary>
/// Initialize the game, including loading the data and initializing the Content.
/// Should only be called when the game is booted or restarted.
/// </summary>
public virtual void StartGame()
{
    // Bind all dependencies within our context
    context.Bind();

    // With all dependencies bound, we can now resolve those we need
    _userSavedData = context.container.Resolve<IUserSavedData>();
    _dataLoaderService = context.container.Resolve<IDataLoaderService>();
    _entityLoaderService = context.container.Resolve<IEntityLoaderService>();
    _entityResolver = context.container.Resolve<IEntityResolver>();
    _actionService = context.container.Resolve<IActionService>();

    // Handle new users
    if (_userSavedData.isNew)
    {
        _actionService.Dispatch<NewUserStateAction>();
    }

    // If the contentId is not in the user saved data, load the default main game content id
    string contentId = string.IsNullOrEmpty(_userSavedData.contentInstanceId) ? _mainGameContentId : _userSavedData.contentInstanceId;
    _dataLoaderService.LoadData(GetContentData(contentId));

    LoadContent(contentId);

    // Inform any listeners that IdleKit has been initialized
    IdleKitInitializedAction initAction = _actionService.Get<IdleKitInitializedAction>();
    initAction.content = _entityResolver.Resolve<IContent>(contentId);
    _actionService.Dispatch(initAction);
}
The StartGame method is the entry point for an IdleKit game. It is responsible for binding the dependencies within the dependency container, selecting the Content to load and then loading the Content (both the data and instantiating the Entities). Finally, the IdleKitInitializedAction is fired to inform any dependent Entities or Services that the startup process is complete. It is at this point that functionality such as the Offline Activity Tracking runs.
SwitchContent
Next define a SwitchContent method.
/// <summary>
/// Dump the previous Content and it's data, then load the new one. Used when switching between
/// main game and event Content.
/// </summary>
public virtual void SwitchContent(string contentId)
{
    // Clean up UI
    _canvasUI.Cleanup();

    ClearContent();

    LoadContent(contentId);

    // Inform any listeners that IdleKit has been initialized
    IdleKitInitializedAction initAction = _actionService.Get<IdleKitInitializedAction>();
    initAction.content = _entityResolver.Resolve<IContent>();
    _actionService.Dispatch(initAction);
}
This method will unload an existing Content and load a new one via the contentId that is passed into the method. SwitchContent is called when switching between the main game and Event Contents.
SwitchStage
Now implement the SwitchStage method.
public virtual void SwitchStage()
{
    IContent content = _entityResolver.Resolve<IContent>(_userSavedData.contentInstanceId);
    content.AdvanceStage();
}
This method is responsible for the process of moving from one Stage to another after the player has completed a Stage. In the case of the default implementation of IdleKit, SwitchStage simply advances to the next Stage within the Content.
ResetGame
Next add the ResetGame function.
/// <summary>
/// Force a reset of the game, including the user's saved data if requested.
/// Usually used to deal with a data push or if the user's saved data gets out
/// of sync with the backend.
/// </summary>
public virtual void ResetGame(bool resetUser = false)
{
    ClearContent();

    IStaticData[] globalData = GetGlobalData();
    _dataLoaderService.ClearData(globalData);

    if (resetUser)
    {
        context.container.Resolve<SerializationService>().ResetUser();
    }

    // Unbind any dependencies within the Container.
    context.Unbind();

    StartGame();
}
This method should be invoked from your game code whenever a soft reset of the game is required. This can happen in a number of circumstances, for example, if the user saved data fails to deserialize correctly, or is found to be out of sync with the user state on the backend. It should also be called when synchronising the client with a new balance data push.
Loading/Unloading Content
Finally, add a couple of utility methods to clear and load Content.
protected virtual void ClearContent()
{
    IContent currentContent = _entityResolver.Resolve<IContent>(_userSavedData.contentInstanceId);

    // Inform any listeners that the Content is about to be unloaded
    PreClearContentAction preClearContentAction = _actionService.Get<PreClearContentAction>();
    preClearContentAction.content = currentContent;
    _actionService.Dispatch(preClearContentAction);

    // Clear content
    _entityLoaderService.UnloadEntity(currentContent);

    // Inform any listeners that the Content has been unloaded
    ClearContentAction clearContentAction = _actionService.Get<ClearContentAction>();
    clearContentAction.content = currentContent;
    _actionService.Dispatch(clearContentAction);

    IStaticData[] contentData = GetContentData(_userSavedData.contentInstanceId);
    _dataLoaderService.ClearData(contentData);

    // Unset the Content Id in the user saved data.
    _actionService.Dispatch<ClearContentIdStateAction>();
}

protected virtual void LoadContent(string contentId)
{
    // Load content data
    _dataLoaderService.LoadData(GetContentData(contentId));

    // Set the content Id in the user saved data
    SetContentStateAction setContentStateAction = _actionService.Get<SetContentStateAction>();
    setContentStateAction.Initialize(contentId);
    _actionService.Dispatch(setContentStateAction);

    // Load content entity
    _entityLoaderService.LoadEntity<IContent, IContentData>(contentId);
}
The ClearContent method uses the UserSavedData to resolve the Content that is currently loaded, before unloading it's Entities and StaticData recursively. The LoadContent method does the opposite.
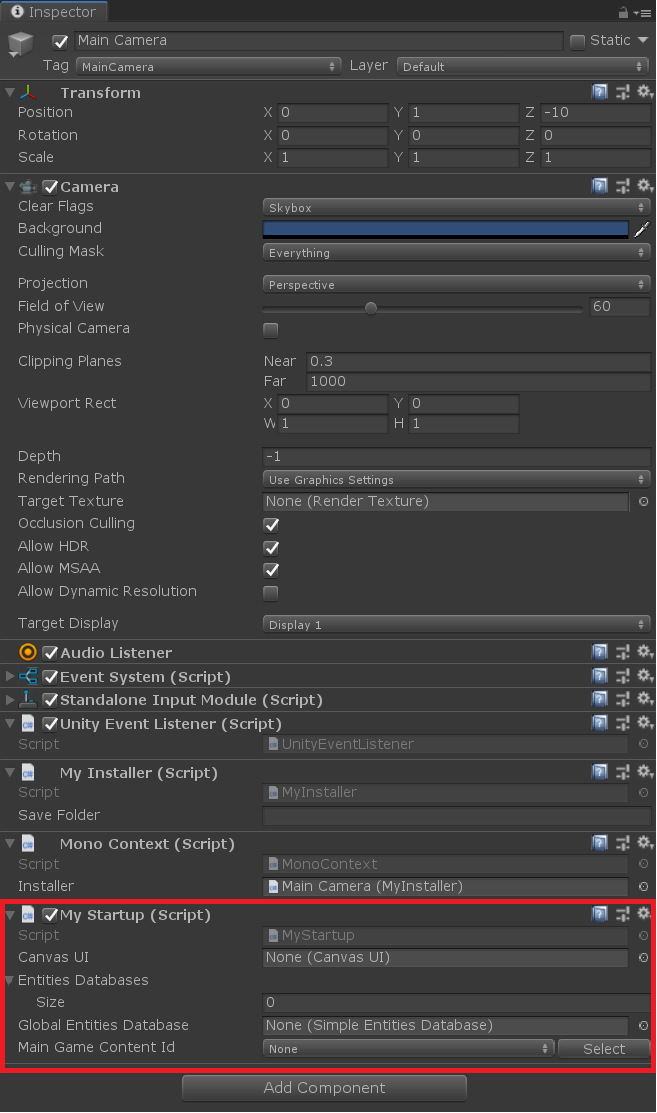
With these methods defined, your MyStartup class is complete. Attach it as a component to the MainCamera GameObject in the Unity Scene.
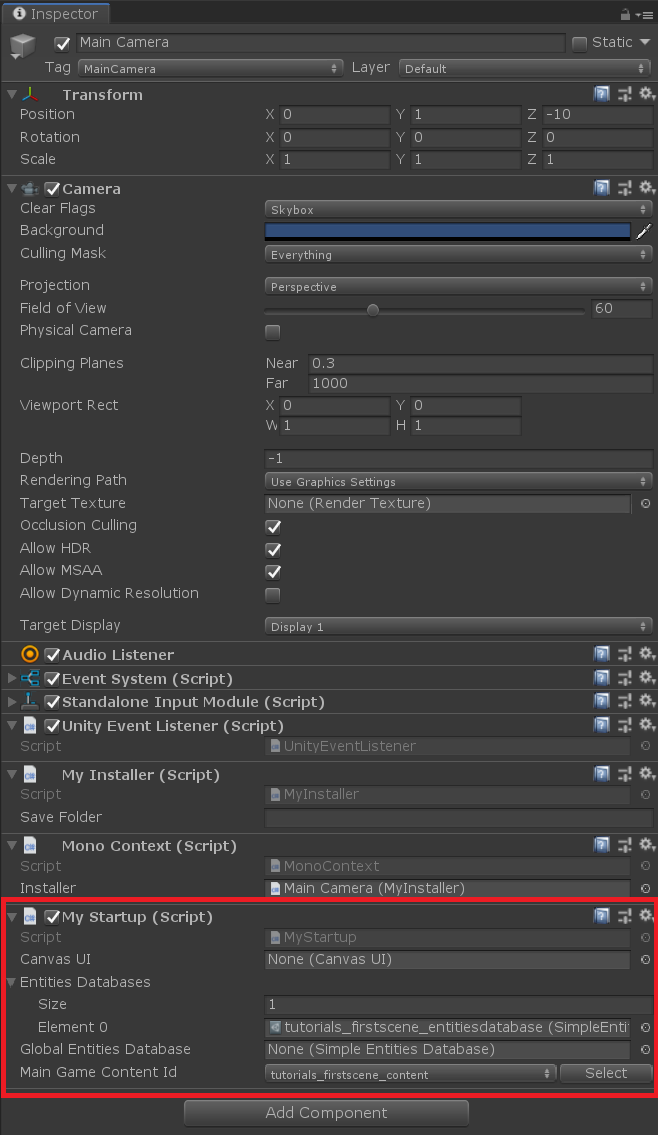
Your MainCamera should now look something like this:
Adding Data
The next step is to specify the SimpleEntitiesDatabase that contains the balance data that will be loaded into your scene. Expand the Entities Databases Serialized Field array to a length of 1 and after hitting the file picker widget, select the tutorials_firstscene_entitiesdatabase. Next specify the Main Game Content Id as tutorials_firstscene_content. This is the id of the default Content that will be loaded when the player first enters the game after install, or after an Event has completed.
Your MainCamera should now look like this:
Adding the UI
Finally, in order to display something when you run the scene, you can add a sample Canvas prefab into your scene. Search your project for the FirstSceneCanvas prefab. This can be found within the idlekit-examples package. Drag the prefab into your scene to add it. IdleKit's canvas view system will automatically populate views for you depending on the Entities that are included in the data loaded into the game.
Note
The CanvasView system is not designed as a production ready view solution but instead is useful for getting up and running quickly while prototyping.
Finally you need to reference the Canvas within MyStartup. To do this select the MainCamera and drag the UI game object that lives under the FirstSceneCanvas prefab from the scene hierarchy and onto the CanvasUI Serializable Field within the MyStartup component.
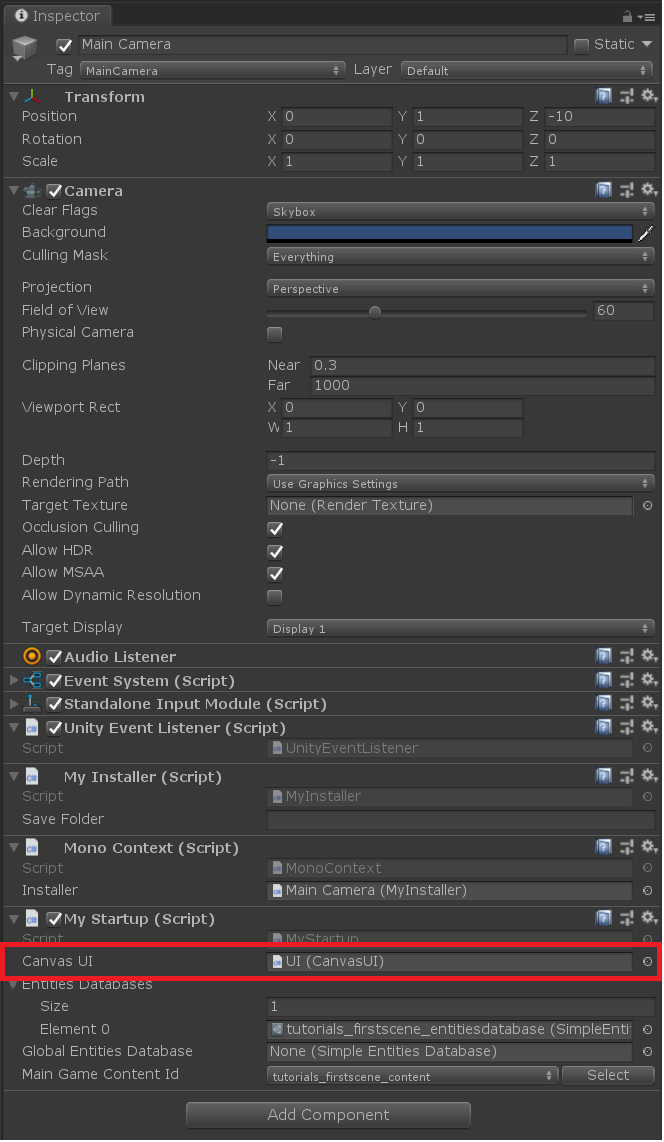
With this last step complete you can now run your scene. IdleKit will be initialized and the balance data specified will be loaded. The debug tool at the bottom of the UI can be used to test the reset functionality. If you look in the console you'll also see that the debug statements within the MyInstaller have been fired. You are now able to replace these log statements with your own custom logic to bind your own dependencies to the dependency container and begin creating custom functionality!